Showing posts with label Side dish for roti. Show all posts

Monday, 3 February 2014

Eating bitter gourd or karela is not a routine for us but mom and dad loves it so much and i have learnt it from my mom over a period of time. Most of the time while doing grocery i am reluctant to take karela because of there huge size like a bottle gourd, but this time i saw these little cuties well packed in separate packet. The no of karelas in the packet were about 12 -15 but there size was quite small just the bite size So i could not resist and grabbed the packet as few were only left and people were amused to see such a small size of this veggie. Even i saw such a small size for the first time. Though later on i realised that peeling and stuffing such a small size of karela was a really tough task but had a sigh of relief when it was done. I would be discussing traditional stuffing which is mostly done in north India, though there can be a lot of creativity and n no of options for stuffing but this one is very popular. This is prepared mostly in summer season because it requires raw mango which is available in June and July. But in Bangalore i don't have to wait for summers, its almost same through out the year.
So lets see the ingredients used in this recipe:-


Stuffed karela

  1. Karela/ bitter gourd
  2. Raw mango 1
  3. Large onion chopped 1
  4. Green chili chopped 2-3
  5. Dhania powder 1 tbsp
  6. Jeera/ cumin seeds 1 tsp
  7. Salt as per taste
  8. Garam masala 1 tsp
  9. Turmeric powder 1 tbsp
  10. Asafoteda 1 tsp
  11. Oil to fry


First of all peel the karela removing outer skin a bit, to reduce the bitterness one can apply little salt after peeling them as the bitterness is further reduced. After that make a slit through the centre longitudinally where filling is to be done.


For making the filling one needs to grate the raw mango, finely chopp the onion and green chili as shown below.


Then little frying of the filling is to be done for that take about 2 tbsp of oil in a pan and heat it. Then add jeera, asafoteda, dhania powder, chopped onion and  green chili, saute it till golden brown and finally add raw mango, salt, turmeric powder and garam masala. If one is planning to store it for longer time then fry the masala till it become brown in colour and if one is planning to consume it within a day or two then a little frying is ok. The masala which i have prepared is not very dark as i have not fried it for longer duration. There will be tangyness of raw mango in the masala.


Lastly cool the masala and fill all the karela with it, make sure that you don't over fill as the filling may come out while frying. Then take oil in a kadahi and heat it, once the oil is ready deep fry the karela's till they become brown in colour.


Finally they look like this. You can serve them with roti or parathas. For me they play role of a pickle as they are tangy and spicy. They can be stored for 4-5 days in refrigerator and consumed with any meal of the day.




Wednesday, 22 January 2014

When it comes to making chana or chole i just look for opportunities when someone is visiting home or i have to just cook for myself. Today my husband is off for his team outing and i have to make lunch for myself so i decided to make it. This chana is highly loaded with protein and iron and can be made sprout out of it. But i like the boiled version of it. It is mainly complimented with puris and halwa. In north India one can find it being served after any jagran or as prasad with suji ka halwa. But in our daily life it can be enjoyed with puris or parathas. it can be made with gravy or in dry form both taste equally good. In today's recipe method can be implemented for either of the version.


So quickly see the ingredients used:-

Black chana
  1. Black chana 200gm
  2. Chopped onion 1
  3. Chopped tomato 1
  4. Ginger garlic paste 1 tbsp
  5. Jeera 1/2 tbsp
  6. Dhaniya powder 1 tbsp
  7. Turmeric powder 1 tsp
  8. Green chilli 1
  9. Asafotida
  10. Garam masala
  11. Coriander leaf for garnish


One needs to soak the chana for 6-7 hours or overnight if one need to make it for other day. Then bring it boil in a pressure cooker around half an hour is need for that. While boiling it add some salt as it help in making them tender fast and salt also gets well incorporated.


Then for tadka take oil in a pan or kadhai add jeera let it splitter, then add onions ginger garlic paste, asafotida and dhaniya powder and saute it till they turn golden brown.


After that add tomato, green chilli, turmeric powder and garam masala. Stirring it continuously to avoid burning.


When the masala is ready add the boiled chana. One can see that there is water along with chana, so if you choose to make it dry remove the water and just add chana and if you want gravy then add the water. So it can be adjusted according to ones choice. I added water along with chana and made to evaporate it while cooking to adjust to my consistency.


One needs to give it a nice boil so that all the masala gets well incorporated with the chana. Also stir it nicely for even mixing. Garnish it with fresh coriander leaf ginger wedges and onion slices and Serve it hot with puris or parathas. So it works as a great side dish with puris and paratha. Enjoy the taste!


Thursday, 19 December 2013

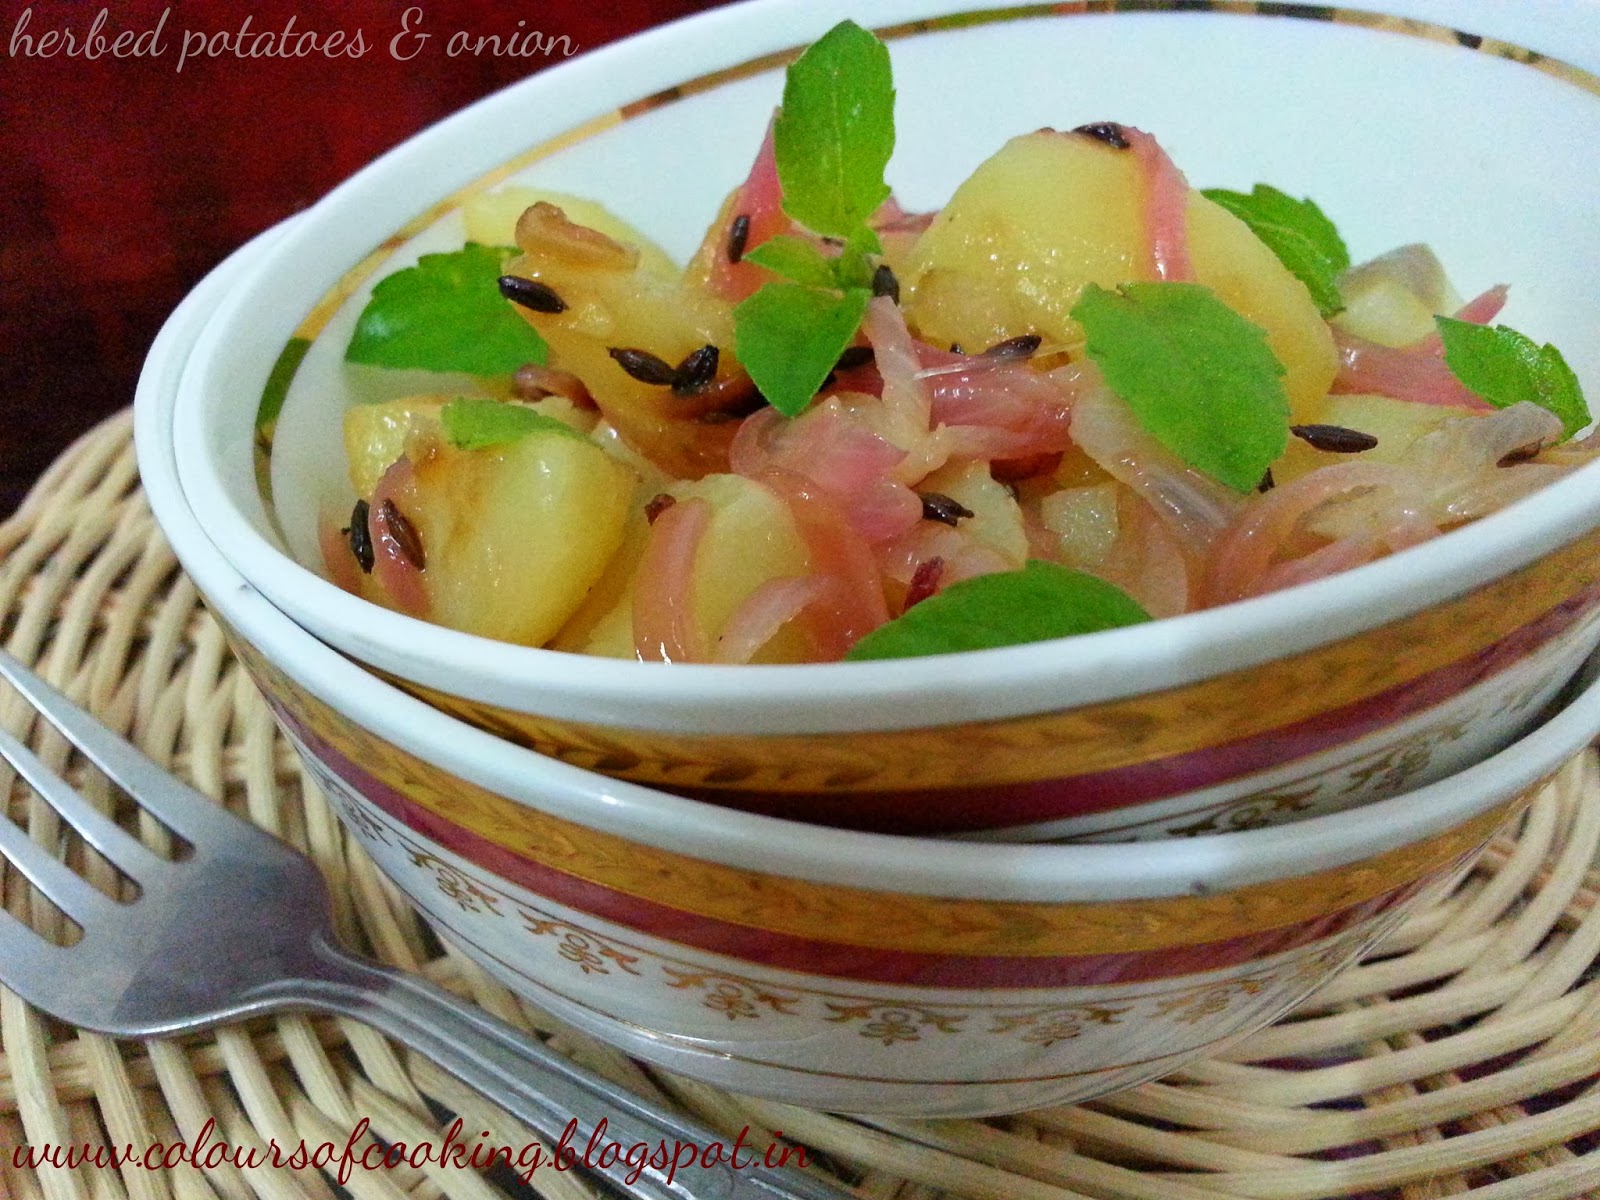
Recently i got a recipe book which is "simply vegetarian" by paragon books. This recipe has been picked from it, as a sensational side to be eaten with bread. Though i hardly gets time to open a book these days coz of my baby who is so demanding and doesn't let me off even for a second. I was bored of making the usual stuff every day and wanted to pack something different for my dear hubby. So i woke up early and flipped through the pages to find something easy and interesting. I paused at this page to check out if i had all the ingredients with me, but it calls for very few and common ingredients which are used in our daily life. Though it used thyme as a herb but i replaced it with basil, as it said u can use herb of your choice and basil was there fresh in my garden so i dint mind plucking few fresh leaves. Also i used cumin seeds which was not a part of this recipe and was my add on. But it turned up tasty and a bit different from usual routine.

Herbed potatoes and onion


This is the cover of the book displaying my recipe along. It is having 100 recipes lets see how many i can introduce here. For this recipe we need:-
  1.  Boiled potatoes 4 nos
  2. 1/2 cup butter
  3. Cumin seeds 1 tbsp (optional)
  4. 1 Red Onion cut into 8 wedges
  5. Garlic cloves 2 crushed
  6. Lemon juice 1 tsp
  7. Herb of choice
  8. Salt & Pepper


For preparing the recipe one needs to follow the following steps:-

  • Firstly melt the butter in a pan or skillet. Then add chopped onion, garlic and lemon juice. 
  • Cook for about 2-3 minutes stirring continuously.
  •  Then add cubed potatoes and mix well to coat in the butter mixture. 
  • Cover it and reduce the heat to low flame and cook for another 20 mins or till potatoes turn brown in colour. 
  • Lastly add the crushed basil leaves or any herb of the season and sprinkle salt & pepper.


Serve it hot with a bread of your choice.

Herbed potatoes and onion


Sunday, 1 December 2013

There is a great news for people who likes baigan ka bharta but are reluctant to prepare it. Why most people are reluctant? Coz the traditional way of cooking requires roasting the whole baigan, So they are afraid of any worms being roasted along with it. I remember whenever i asked my mother to cook it for me she use to say the same thing; there may be worms inside and i don't want them to roast along. Also it is quite difficult and time consuming as many people said. But today i would be discussing a very simple way to cook this recipe, so no one will give a thought before cooking it. This process require boiling the baigan rather than roasting so there are lots of benefit. One can choose baigan of any size and not have to depend on a single large baigan. Also one can peel and cut it to check the presence of any worm inside.

Ingredients used are:-

Baigan ka bharta
  1. Baigan/eggplant
  2. Tomatoes
  3. Onions
  4. Ginger-garlic paste 1 tbsp
  5. Green chillies finely chopped
  6. Turmeric powder 1 tbsp
  7. Garam masala 1tbsp
  8. Cumin seeds 1 tbsp
  9. Asafotida pinch
  10. Dhaniya/coriander powder 1tbsp
  11. Salt to taste
  12. Oil 2Tbsp

First of all peel the baigan and cut into small pieces. Then boil them in a boiler till they become tender.

Strain the pieces through strainer, press them to remove all water.

Now take 2 tbsp of oil in pan, heat it and add cumin seeds. Also add a pinch of asafotida.

After that add ginger garlic paste and onion. Saute them till they turn golden brown.

After that add tomato, dhaniya powder,chillies, turmeric powder and garam masala.

Stir it continuously till all the things incorporate well to form a mixture.

When the masala is ready add the brinjal and mix well to form a paste like consistency.

One must ensure that all water has evaporated and the mixture starts leaving the pan. The final dish looks like the one shown below. It works well as a side dish with roti, paratha, nan or even with rice. Hope this process will solve problem for many who are reluctant to make it quite often.


Tuesday, 15 October 2013

Its an every day challenge to present something new on the table, that too with a wow feeling . Also being a vegetarian our options get minimised. Though i have never much experimented with green onions and this one is the basic side dish or a veggie which i make and my husband eats without any questions. These spring onions or green onions have a mild taste then our regular onions and it is eaten raw as salad or in semi cooked form or is used as ingredient in many dishes. In a layman's term i would call the spring onions as baby onions as they are plucked at immature stage with a little bulb and long green stem. Nutritionally they have benefits of an onion as well as green veggie. So lets get started with this most simple and basic recipe of spring onion.

Ingredients used are:-
Spring onion vegetable
  1. Spring onions 1 bundle
  2. Boiled potatoes 2
  3. Oil 2 tbsp
  4. Ginger garlic paste
  5. Tomato 1
  6. Salt to taste
  7. Jeera 1/2 tbsp
  8. Garam masala 1/2 tbsp
  9. Turmeric powder 1/2 tbsp
  10. Dhania powder/coriander powder 1/2 tbsp
  11. Asafoetida 1 pinch


First of all take spring onions and wash them properly specially near the bulb area as mud is accumulated near that area. Then chop them as shown in the figure below. 


After that take oil in pan and turn the stove on medium. Add jeera followed by ginger garlic paste, asafoetida powder and turmeric powder. Stir in properly without burning the spices.


After that add chopped tomato and spring onions. Also add the salt and garam masala at this stage. Then add the diced potatoes which were already boiled and kept. Cover the pan after giving a stir. Check after 5 minutes all the ingredients must have incorporated well and that means we are ready to go ahead and serve it.


It makes a serving for 4 people and takes about 8-10 minutes for cooking. I packed this one for my hubby's lunch and asked him how was it? his reaction was, its different! so try out and see how you like this one.


Health benefits of spring onion:-
  1. It lowers the blood sugar level.
  2. It supports against gastrointestinal problems.
  3. It speeds up the blood circulation level in the body.
  4. It is often used as medicine for common cold.
  5. It is an excellent source of vitamin A, K and vit-C.


Thursday, 12 September 2013

Pumpkin has always been my dad's favourite, but i never had a taste for it till i was a kid. I always wondered whats so special about it? Mostly it was prepared during pooja ceremony or any special festive occasions at home. Though this version i have learnt from my mother in law, n after giving it a try for once i make it atleast once in two weeks. I am not a fry - fry lover but my husband holds the other side. So in order to suffice both of us i come out with something which is tastier as well as healthy. This fried pumpkin stays for a longer time and one can carry it along if he/she is travelling. This version is quite crisp and person who likes sweet n chili at the same time will really love it.  

Lets look at the ingredients:-
Fried pumpkin vegetable
  1. Methi seeds/fenugreek 1/2 tbsp
  2. Saunf seeds/fennel 1 tbsp
  3. Salt as per taste
  4. Sugar 2 tbsp
  5. Asafoetida a pinch
  6. Red chili powder 1/2 tbsp or 2 whole chili
  7. Turmeric powder 1/2 tbsp
  8. Dry mango powder/ amchur 1 tbsp
  9. Garam masala 1/2 tbsp
  10. Ginger garlic paste 1 tbsp
  11. Oil to fry 250ml

lets get started with the cooking:-
Here are the ingredients used in cooking this vegetable. Mostly dry ingredients are used and also frying removes the water so one can carry this vegetable for a long run.


First of all peel the pumpkin and cut in a dice shape. Wash and keep aside for frying.


Then take oil in a pan or kadhai and switch on the stove, let it get hot. After that put the diced pumpkin and fry them till they attain golden brown colour.


One can see the colour of fried dices in the pic below. There is one tip if you are running short of time then take oil enough to fry all the pieces at a time or one can also go with little oil and fry the pieces in a batch one after another. The left over oil can be strained though a metallic sieve and can be used later on.


After frying was complete, i was left with 2 tbsp of oil in the same pan which i used to give it tadka. Fenugreek seeds were added followed by a pinch of asafoetida.


After that rest of the spices were added like fennel seeds, red chillies, Garam masala, Ginger garlic paste and turmeric powder.

When the spices starts leaving their aroma add in the pumpkin pieces. Lastly add salt, sugar and dry mango powder. Mix all the ingredients well and cover the pan for about 5 minutes so everything gets well incorporated.


Finally Garnish with fresh coriander leaves and enjoy it with puri, paratha or roti.


Friday, 23 August 2013

Bhindi or ladyfinger is a widely used vegetable all over India. It is been cooked in a variety of manner in different parts of the country. Some people like it in dry form, some with lots of spices, some with gravy and everyone have there own way of cooking it. The recipe which i am sharing today is quite common in name, but lots of people ask how to cook that? Even i dint knew how to cook it for a long time, unless my mother in law shared this recipe with me. I always thought that it requires lot of effort and ingredients but it is quite simple and can be made with the everyday spices used in the kitchen.

lets look at the ingredients used:-

Stuffed Bhindi
  1. Bhindi 250gm
  2. Onion 1 chopped
  3. Oil 3tbs
  4. Jeera/cumin seeds 1tbs
For stuffing
  1. Salt as per taste
  2. Red chili powder 2tbs
  3. Turmeric powder 2tbs
  4. Dhania powder 3tbs
  5. Garam masala powder 2tbs
  6. Dry mango powder 2tbs


Looking at the step by step process:-
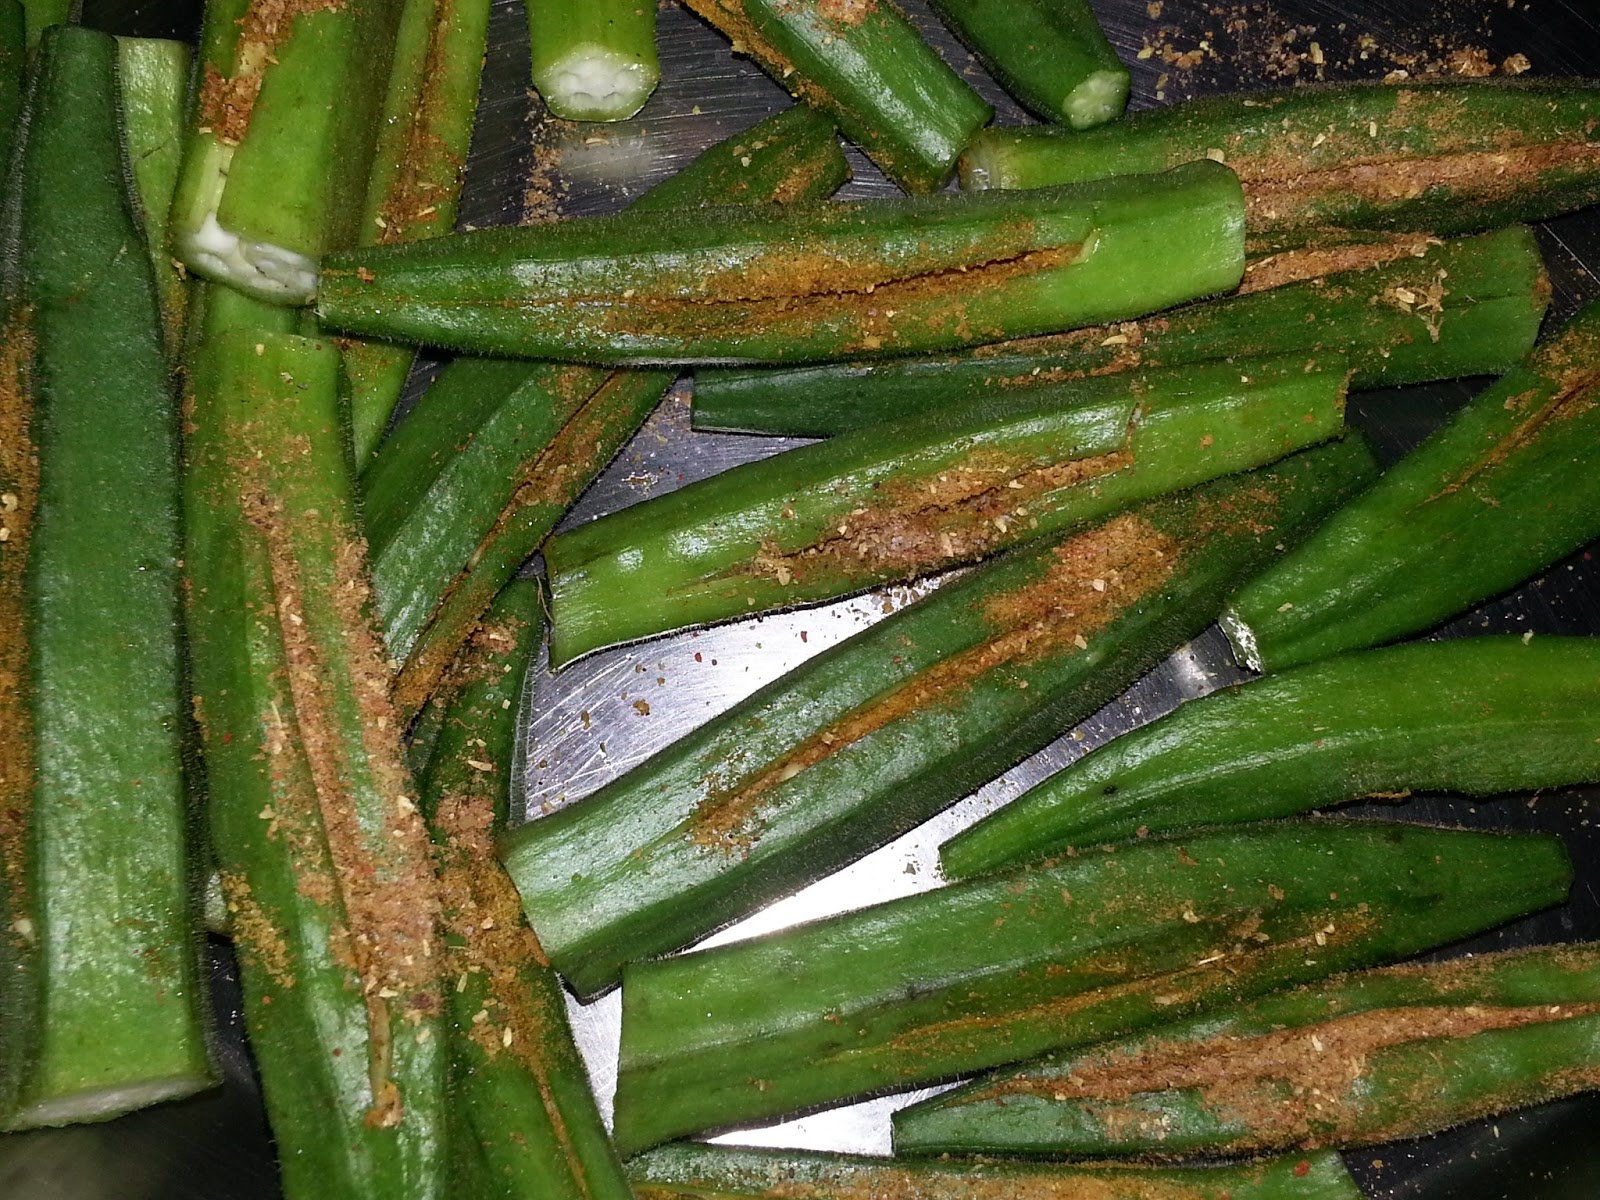
First of all take bhindis and chop off both the ends, Make a slit on one side ensuring that the knife does not pass through the other side. One can see in the image below how slit is made. 


Then take all the spices as mentioned and mix them together to make filling for the bhindis. 


Fill the mixture in the slit which was made earlier. One can see in the image how bhindis look like after stuffing in the mixture.


After that take oil in a pan/kadhai, add jeera and chopped onions saute it till golden brown in colour.


Then add bhindis in the kadhai, stir in with the onion and cover it. Keep the flame on slow and stir after 10-15 minutes.


It takes about 20 minutes to cook the bhindis properly and they will turn golden brown in colour when ready.


Bharva Bhindis can be enjoyed with roti or naan and is mostly used as side dish during lunch or dinner. 

Benefits of ladyfinger/bhindi :-
  1. The fiber and mucilage found in Bhindi helps adjust blood sugar by regulating its absorption.
  2. It helps lubricate large intestine due to its laxative property.
  3. It helps to prevent constipation.
  4. It is good for summer heat treatment.
  5. It is good for preventing diabetes.
  6. It is ideal vegetable for weight loss and is store house of health benefits provided it is cooked on low flame.